Tips to make Professional GoPro Timelapse Videos
From capturing sports to vacation videos, the GoPro packs a punch for its size. Also, the GoPro offers multiple timelapse options. In this post I will explain the best way to use the GoPro for creating timelapse videos, and the use of filters and motion blur to take your timelapse to a higher level.
The beauty of timelapse videos is the uncovering of complex processes that we don’t see in normal speed, like cloud movement and water flows, but also the dynamics of human life in a big city. Creating timelapse videos has become more easy. Most DSLR’s / DSLM’s have a built-in timelapse function, and for the older camera models there’s remote triggers and intervalometers available. Even smartphones offer timelapse features, but because of the lack of control over the camera settings I would not recommend smartphones for creating a professional looking timelapse video. The GoPro is a really good middle-ground; it is affordable, compact and easy to use, but it offers more control over the most important camera settings.
Timelapse video I shot during a three day trip to Venice
Multi-Shot vs. Timelapse Video mode
The Timelapse Video mode is a good option in case you have zero time for post production of your timelapse video. However, if you do have time, patience and the appropriate software (GoPro studio is a good starting point, and it’s free) there’s multiple reasons to choose Multi-Shot mode instead. First of all, Timelapse Video mode only lets you decide on the interval (seconds) and the resolution (4K). Multi-Shot mode offers more advanced options for capturing your timelapse. That’s why you’d want to choose Multi-Shot.
Timelapse and Nightlapse mode
Within Multi-Shot mode you’ll find Timelapse mode and Nightlapse mode. The Timelapse mode lets you pick Interval, the size in megapixels (MP) of your pictures, and a Spot Meter (keeps track of changes in light and adjusts the camera to those changes - should be turned off). Nightlapse mode adds an important option: Shutter Speed. In order for the sensor of the camera to capture enough light during nighttime shooting, the camera shutter must stay open for ~1 ~2 seconds. This is where the Shutter Speed option is needed. Both modes have one other very important option you should enable: ProTune (PT).
ProTune (Hero4) and RAW (Hero5 >)
The older GoPro models, such as Hero4, only saved images in .jpg format. From the Hero5 on, GoPro cameras allow RAW photgraphy. When pictures get saved as JPG, it means you lose some quality and information about colors compared to shooting RAW. On the older models, use ProTune. On newer models use RAW to retain more image information for post processing purposes.
When shooting .JPG, the camera already applies color grading and quality enhancements in the camera itself when saving the image. Ideally, you’d want to take that role from your camera and make the most out of the footage in post production.
ProTune gives you some control over this color grading and quality enhancement process: you can set the White Balance, Color, ISO Limit and Sharpness.
- Setting the correct white balance will determine the further colors in your image. Setting the right white balance depends on the light source. Natural daylight is relatively cold/blue (~5600K), artifical lighting is relatively warm/red (~3800K).
- The Color should be set to ‘flat’ to get less colorful images from the camera. This way, you get more information about highlights and shadows, instead of colors. You can correct the colors of the images in post production, but it’s harder to gain information about shadows and highlights through post-production.
- ISO limit will set the max. ISO
- Sharpness can be set to ‘Low’ and done in post production.
A good starting point for post production when using ProTune is GoPro Studio. It’s free software and it helps you deal with the most important aspects of editing GoPro footage. Ideally you’d want to use more professional (paid) software, – I like working with Adobe Lightroom, After Effects and Premiere Pro. More professional software gives you way more control over the color, sharpness, clarity, lens distortion and numerous other aspects of your GoPro images, and it gives you the ability to encode your final video in a better codec, at a higher bitrate.
A detailed step-by-step guide about the Multi-Shot Timelapse and Nightlapse modes can be found on the Offical GoPro website.
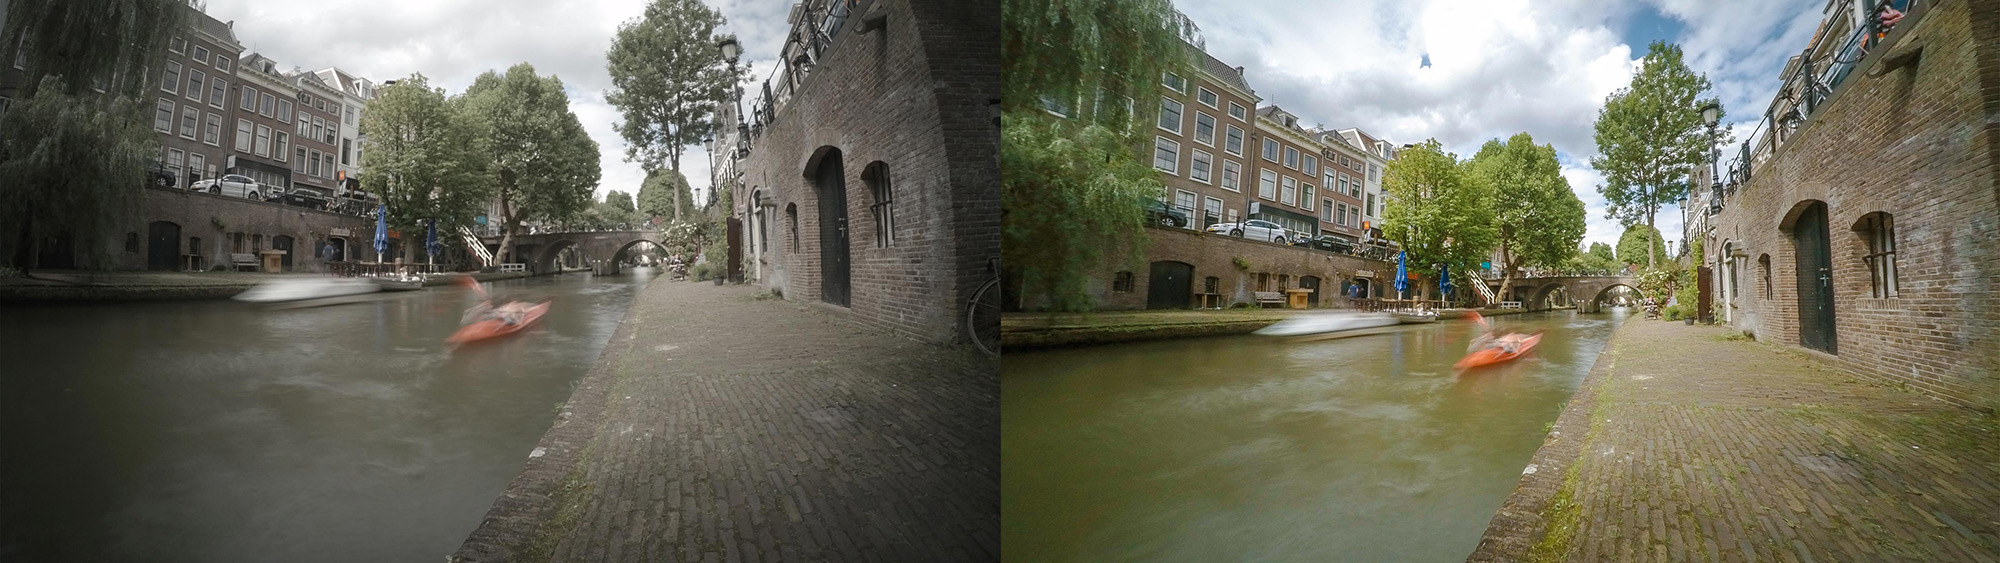
A ‘flat’ image compared to the final image. Utrecht, the Netherlands.
Capture Motion
One of the many aspects of a good looking timelapse video, is motion blur. It’s the effect where moving light sources become trails, water seems smooth as a mirror, and traffic and people smoothly blend into one another.

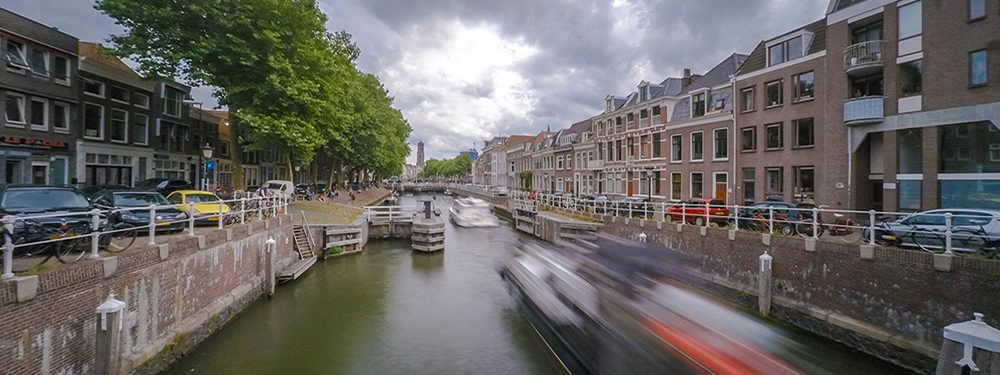
Motion Blur in a GoPro picture of the Dom Tower in Utecht, the Netherlands
Motion blur occurs when shooting at a low shutter speed, for example below 1/10th of a second. The slow shutter speed captures motion of a subject/object and merges this motion it into one single picture. The only way to get a slower shutter speed on the GoPro is to use Nightlapse mode, which enables you to set the shutter speed manually (as discussed earlier in this post).
However, using Night Lapse mode with a slow shutter speed during daytime will result in an overexposed image. To get a slow shutter speed during daytime, you’ll need to darken your image. This is where an ND (Neutral Density) filter comes in. ND Filters come in different strengths; ND1000 (or ND3, ND110 or 1000x) is a solid filter for adding motion blur to GoPro timelapsevideos. You’ll also need an adapter ring from the GoPro lens (or plastic case) to the size of the filters you’re going to use. I recommend to use a solid ND, opposed to a variable ND filter, as most Variable ND filters show a cross ‘x’ pattern on the image when set to 'max' – especially when using a wider angle lenses (like the GoPro!). I decided to get a GoPro -> 52mm thread adapter + a step-up ring from 52mm to 67mm + a 67mm ND filter so it also fits other lenses I have. For the GoPro it’s OK to pick a slightly smaller filter size like ~50mm, as long as it’s an ND1000 filter. The bigger the filter, the higher the price. A filter that’s too small might cause Vignetting (black/dark corners).
A good filter will cost you around $75 to $150, but it’s dependent on the size. The bigger the filter, the higher the price. Between the different filters of the same size, there will be quite a difference in pricing depending on the brand. As with In most cases with camera and lens accessories, the more expensive the gear, the better the quality. You don’t have to pick the most expensive filter. I chose an ND1000 made by Benro. They’re relatively new to the filter market, but I thought I’d give it a try over the more expensive, already established brands. The filter does it’s job, even on the wide angle lens of the GoPro.
With the ND filter attached to your GoPro, it’s possible to use the Nightlapse mode during daytime without overexposing the image. After selecting Nightlapse mode, set a shutter speed of 2 seconds. Your images will be properly exposed and the motion is captured and blurred into one image.
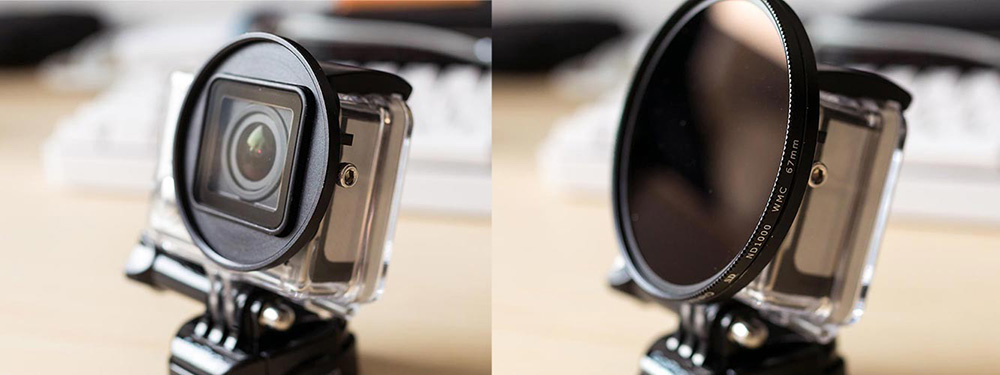
GoPro + 52mm adapter + 52mm – 67mm Step-up ring + 67mm ND1000 filter.